
InstaMAT has been upgraded and Early Access 2 is now available!
The UI is now available in multiple languages, and it seems that it is now possible to set the UI to Japanese.
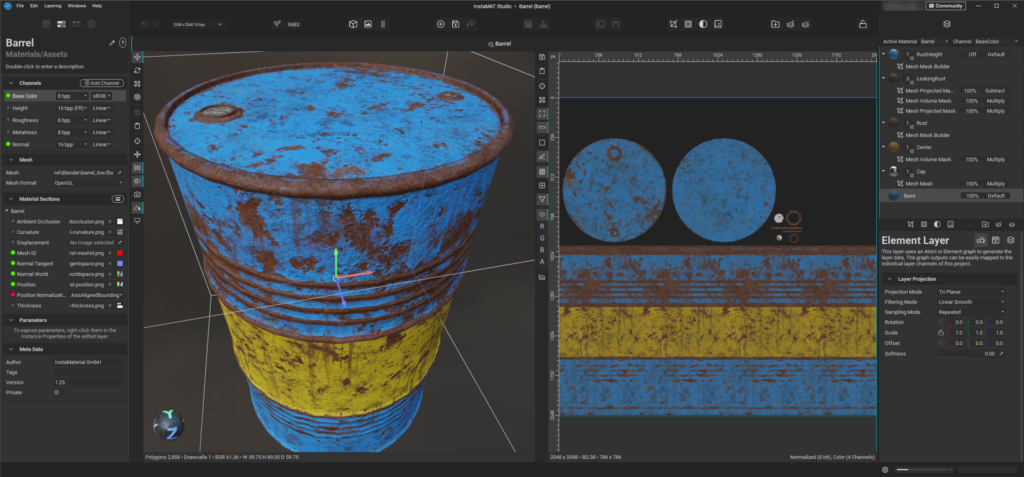
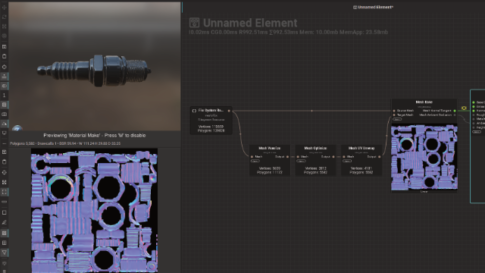
We are looking forward to future versions of InstaMAT, and this time we tried the “Layering” mode, which is a texture creation mode that allows painting in multiple layers, similar to the Substance 3D Painter mode.
It is intended for beginners as it focuses only on basic usage.
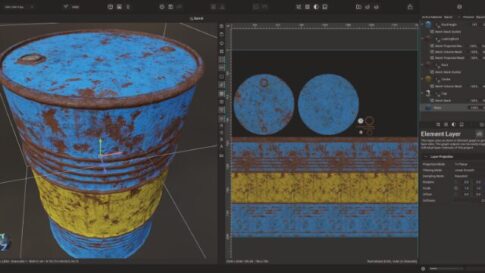
I modeled and verified the low and high models of a simple drum model in Blender.
The screen structure is similar to that of substance painters, and substance users seem to be able to pick it up easily.
Contents
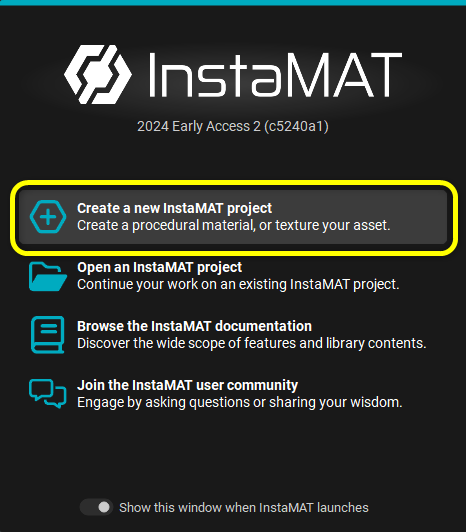
Create a new project
The first step is to create a new project.
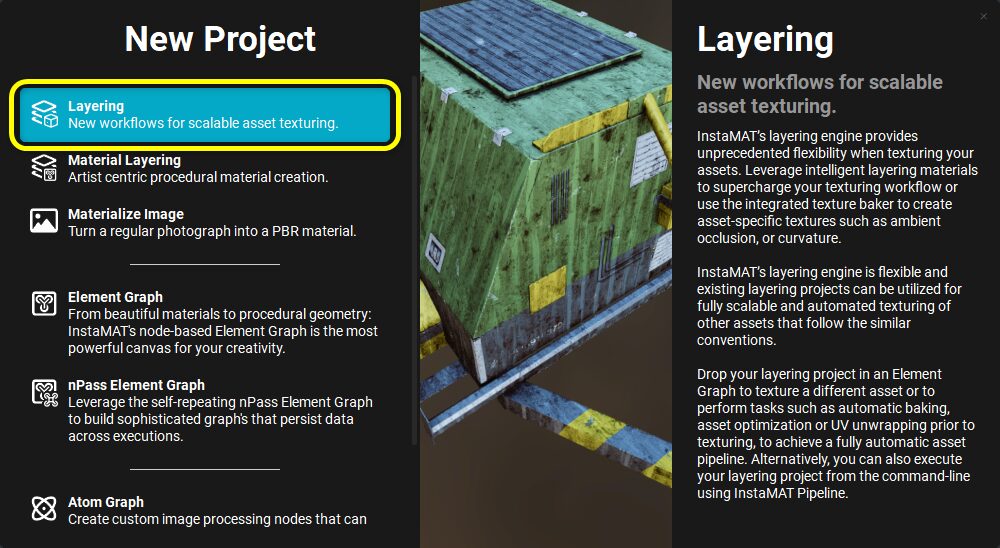
Select Layering mode
Enter a project name, etc. and set the Type to “Multi-Material“.
Specify the model in the “Mesh” field.
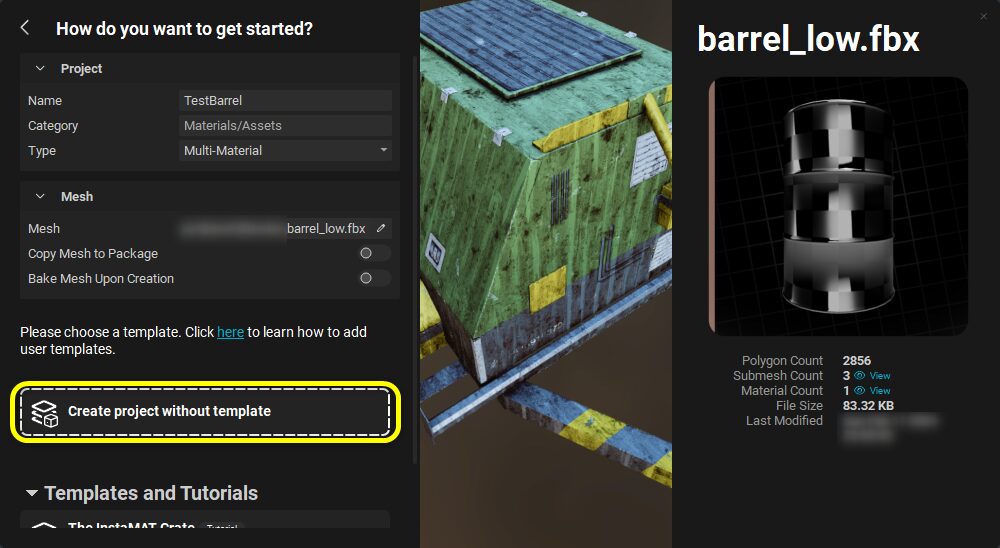
When you are done, create a project with Create project… to create a project.
Bake first
Once the project is created, bake from the high model.
Open “Mesh Baking” from the icon at the top of the screen.
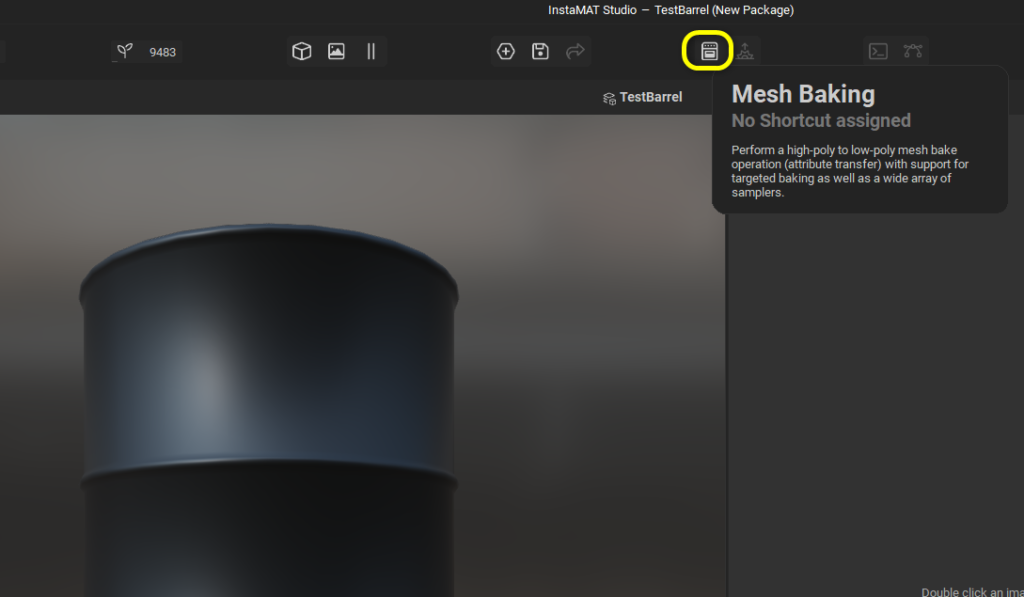
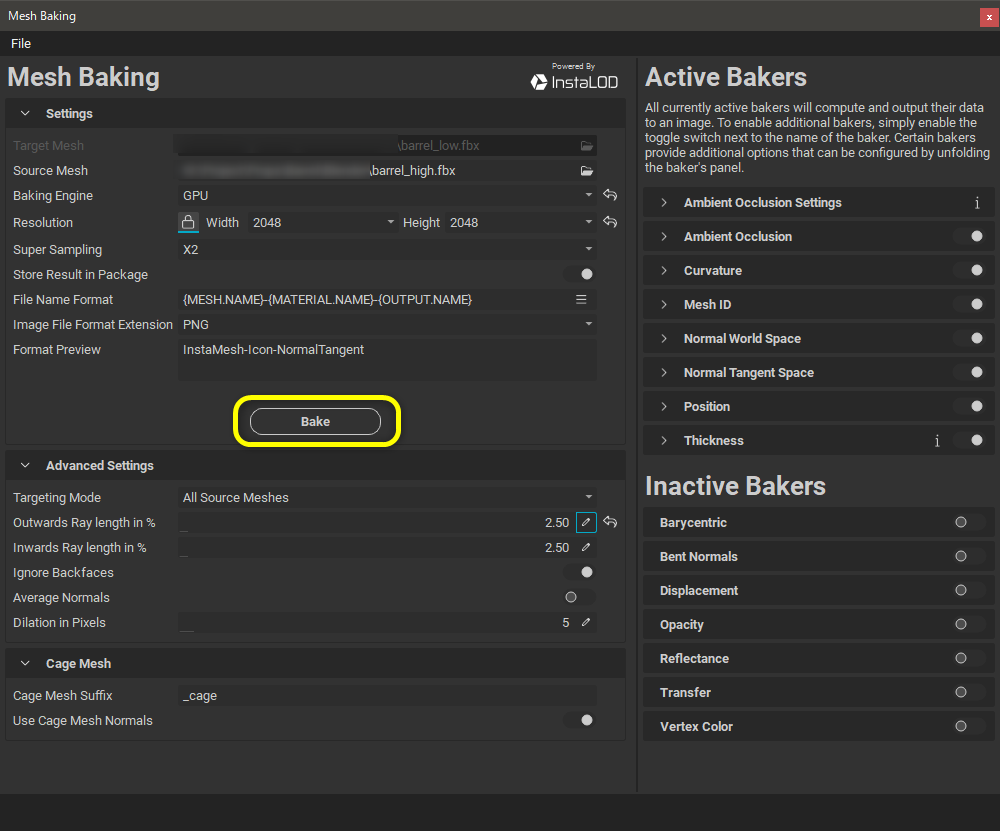
When the Mesh Baking window opens, specify a high model as the Source Mesh,
Set the resolution of the baked texture, and set the Baking Engine to “GPU”.
Then, adjust the ray length, etc., and activate the items you want to bake on the right side to set the various settings,
In this case, the default settings are used.
I see the bake function is using InstaLOD’s functionality.
I was able to bake very quickly!
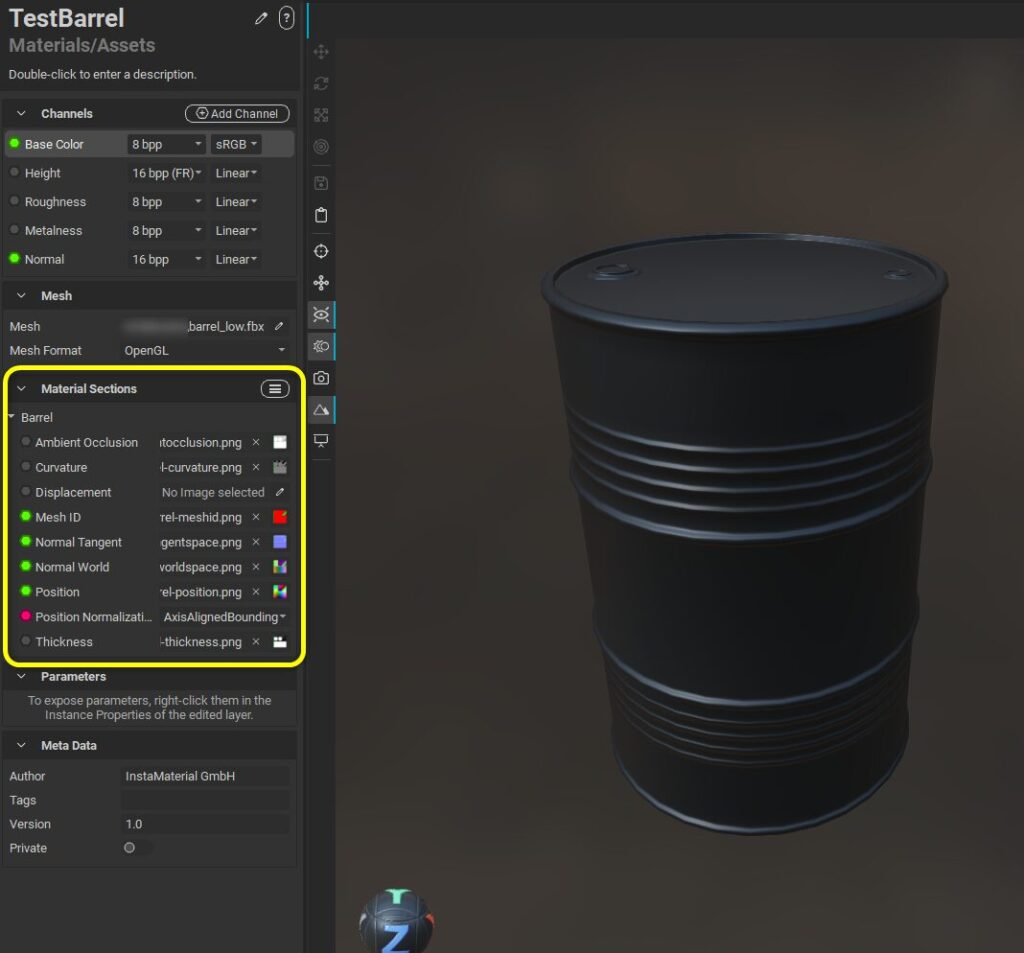
After baking is complete, the baked textures are automatically set to the Material Sections on the left side of the screen,
The baked textures are automatically set in the Material Sections on the left side of the screen and are reflected in the model in the viewport.
I don’t see a function in the substance painter that looks at the mesh name and bakes with the matching mesh?
I tried to find it, but there didn’t seem to be any such feature.
But then the official InstaMAT X account told me about it!
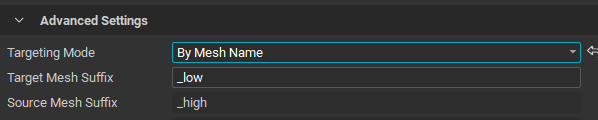
It seems that by setting the Targeting Mode to “By Mesh Name”, meshes matched by mesh name can be baked together.
Creating Layers
Layering”, the layer editor, is displayed on the right side of the screen.
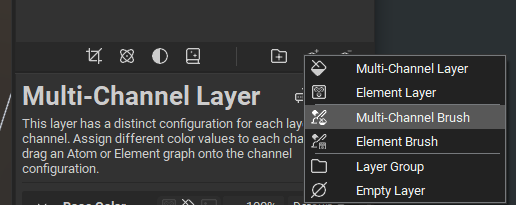
Click the Add New Layer button to add a layer.
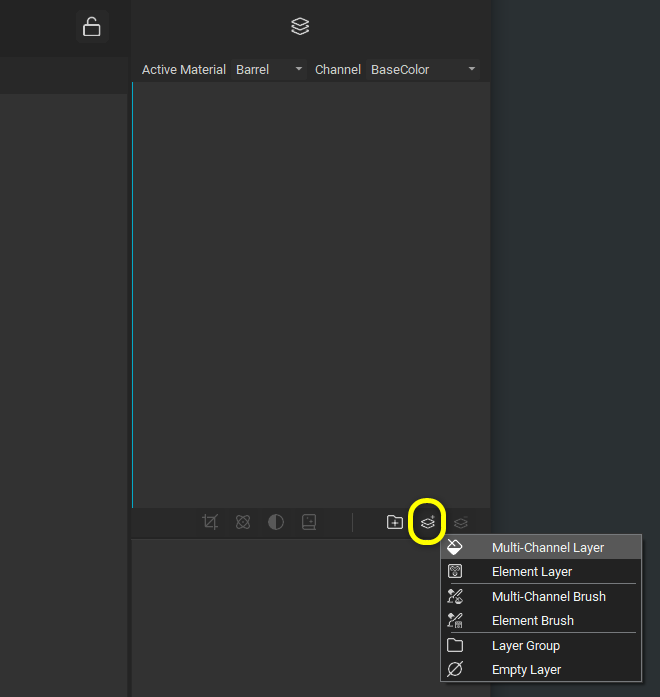
Multi-Channel Layer
First, let’s add a Multi-Channel Layer.
This layer has a different configuration for each layer channel. Assign different color values to each channel or drag the graph of atoms or elements to the channel configuration.
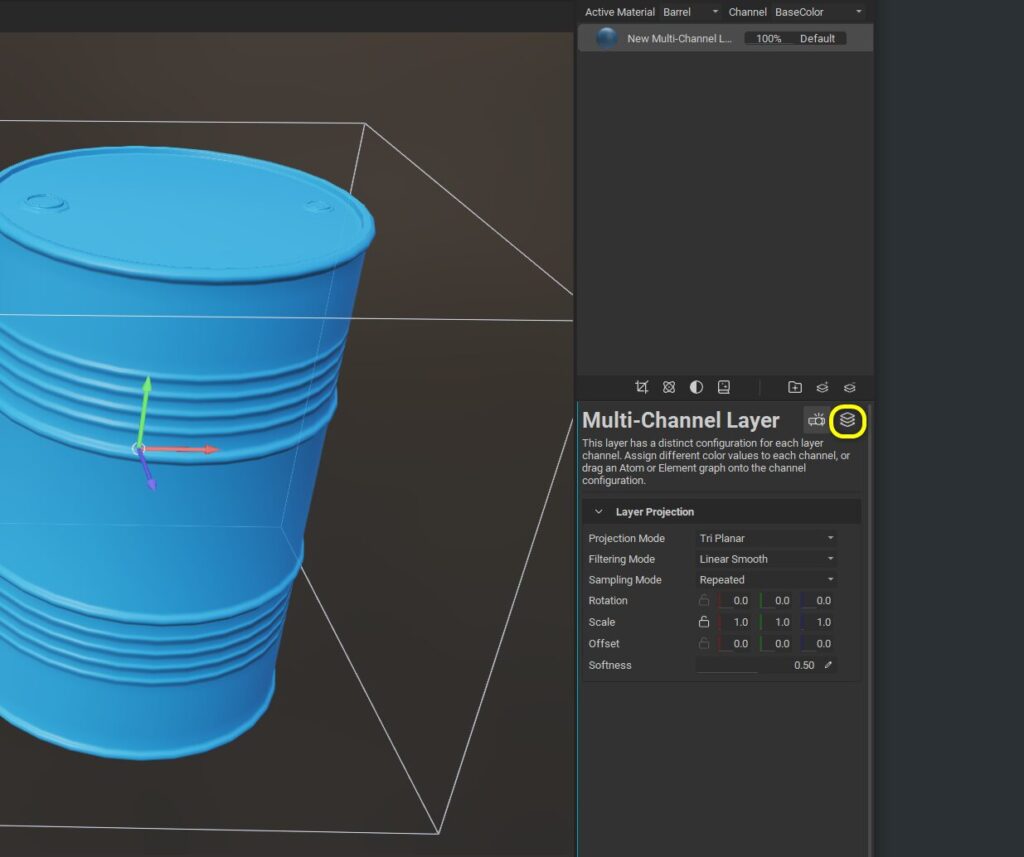
This will assign a single color to the model.
This is like a layer that fills multiple channels, such as Base Color.
Pressing the Layer Channels button changes to the color editing screen.
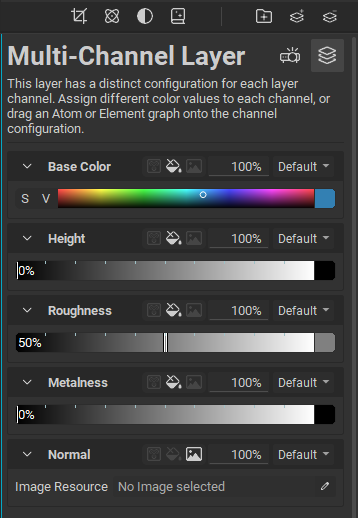
In terms of substance painters, it is similar to a fill layer.
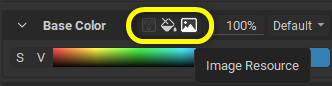
The default color is monochromatic, but images and graphs created with InstaMAT’s material graph function may also be used.
If you want to turn off the effect on a particular channel, set the percentage to 0% to turn it off.
You can change the value by mouse dragging on the parameter.

Multi-Channel Brush
This layer generates layer data using procedural paint strokes.
3D painting is done directly on the mesh using a mouse or tablet pen.
Multi-Channel Brush allows you to paint with a brush on multiple channels.
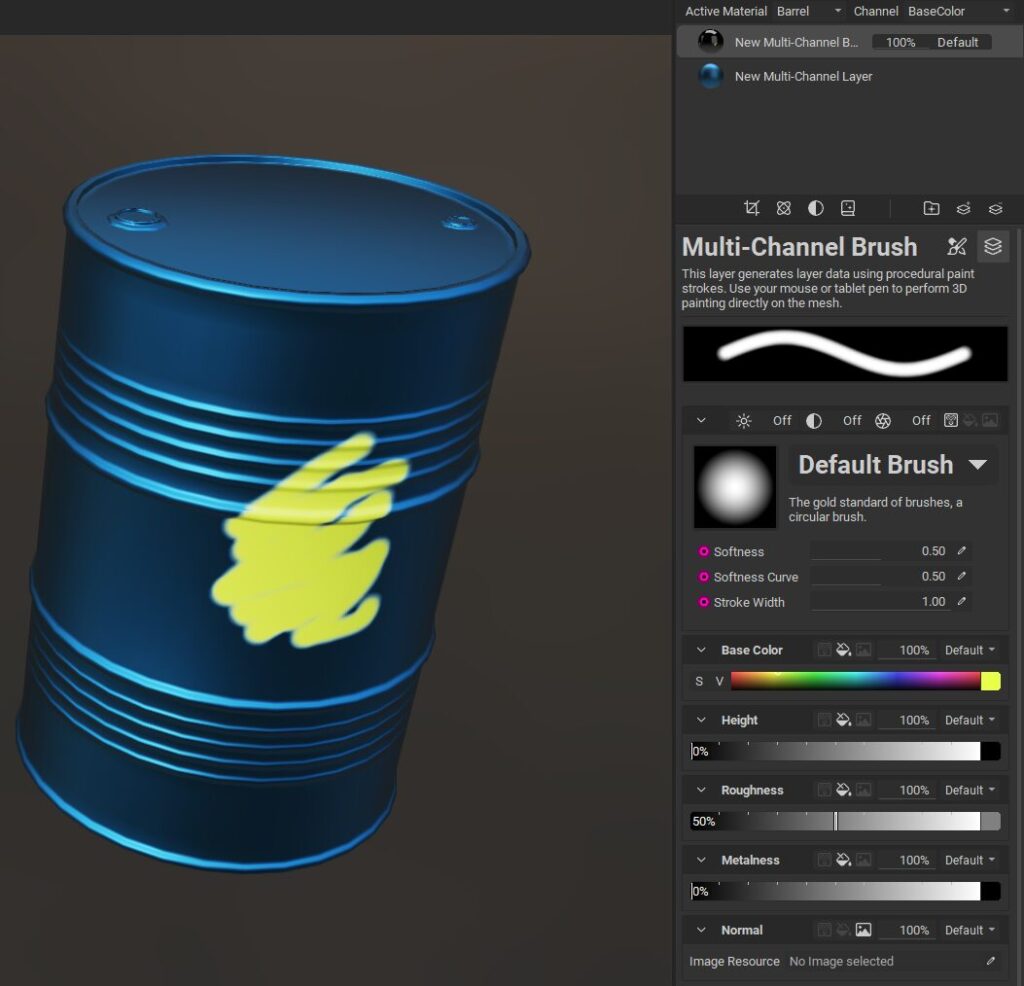
In addition to monochromatic colors, images and graphs can also be used here.
This area is also easy to become familiar with because the operation is similar to that of the substance painter.
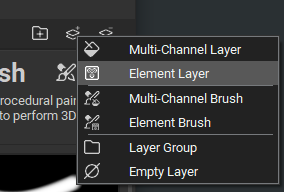
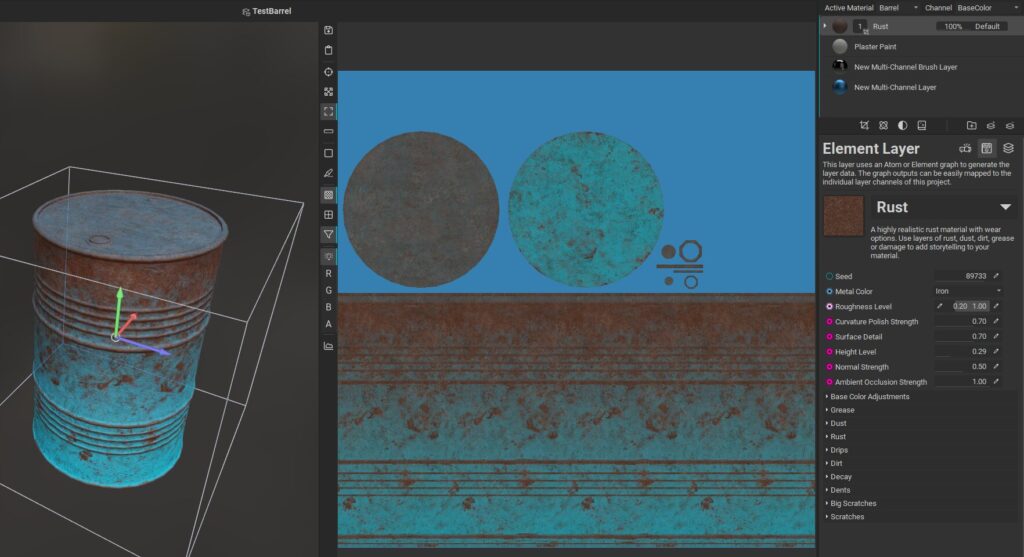
Element Layer
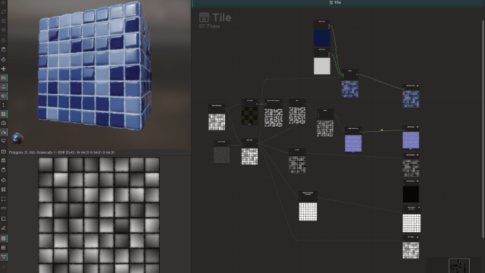
This layer uses the Atom or Element graph to generate layer data. The output of the graph can be easily mapped to the individual layer channels of this project.
The Element Layer allows you to assign an Element Graph, InstaMAT’s procedural material graph.
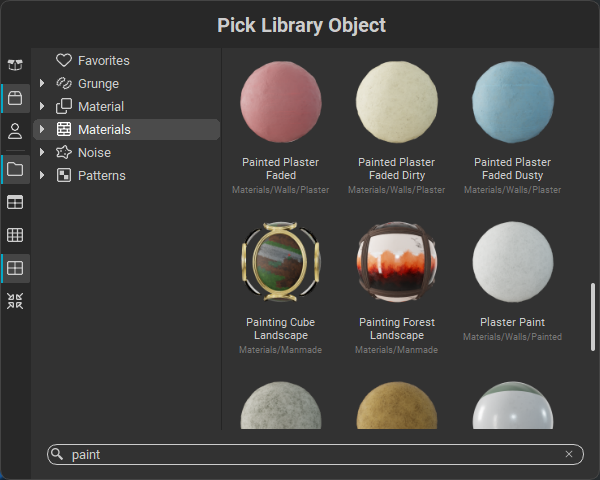
There are a number of pre-installed Element Graphs in the library.
Plaster Paint was selected.
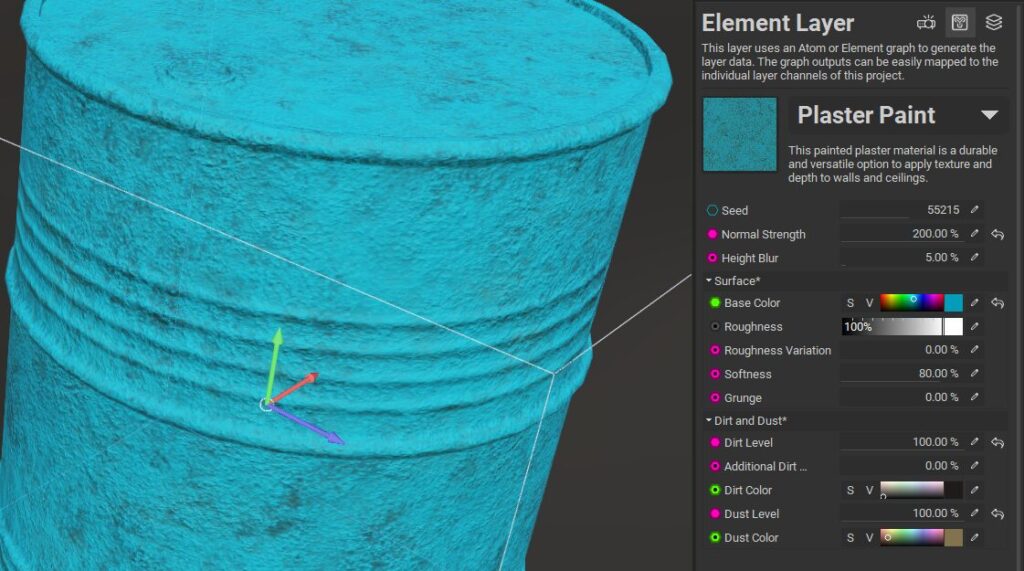
Element Graph materials have various parameters that can be changed to customize their appearance.
Add Layer Mask
Masks can be added to layers.
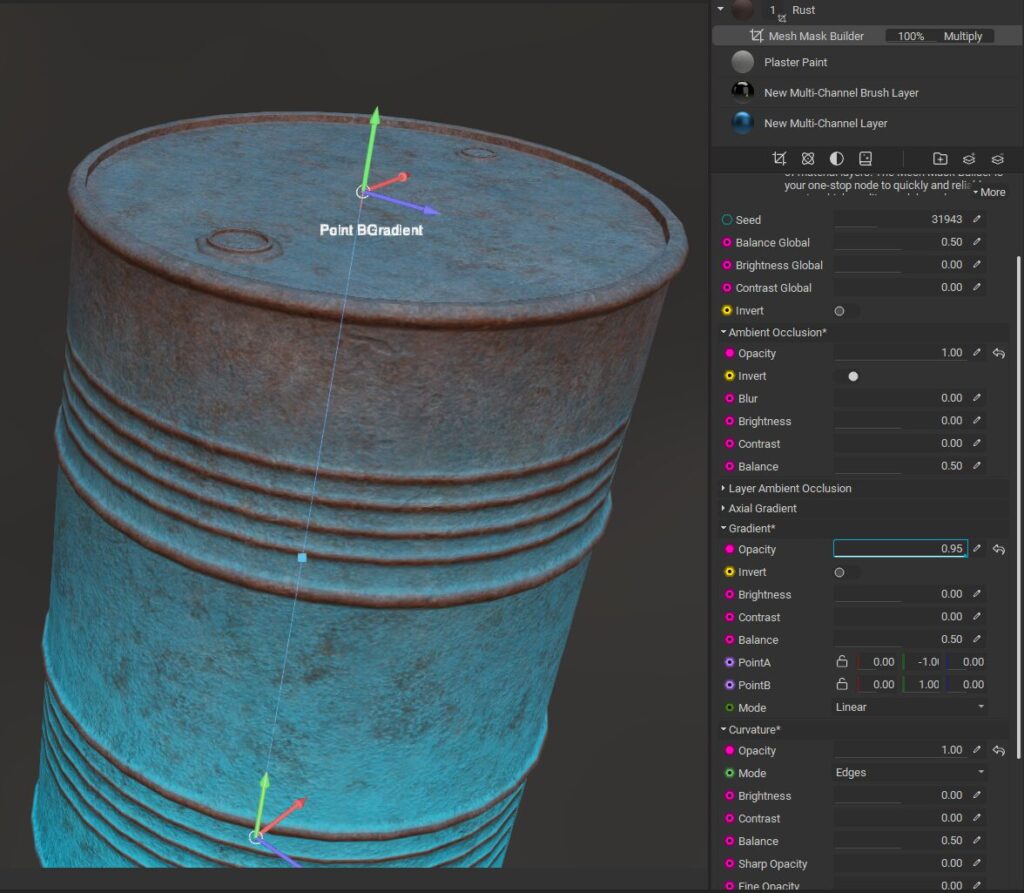
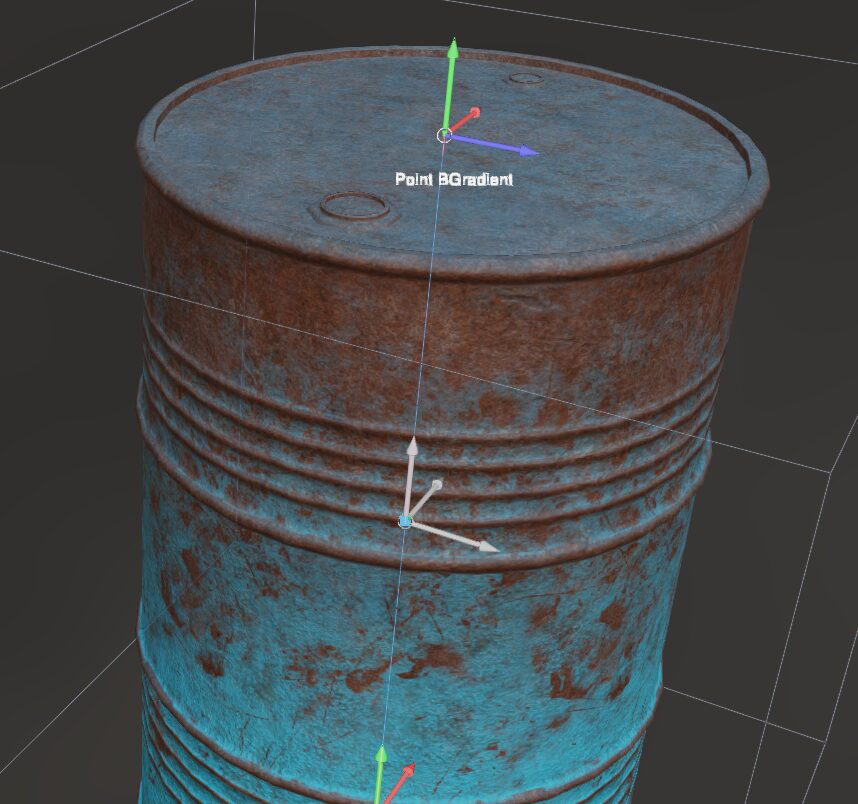
I assigned the Rust material “Rust” as an Element Layer and applied “Mesh Mask Builder” from Masks.
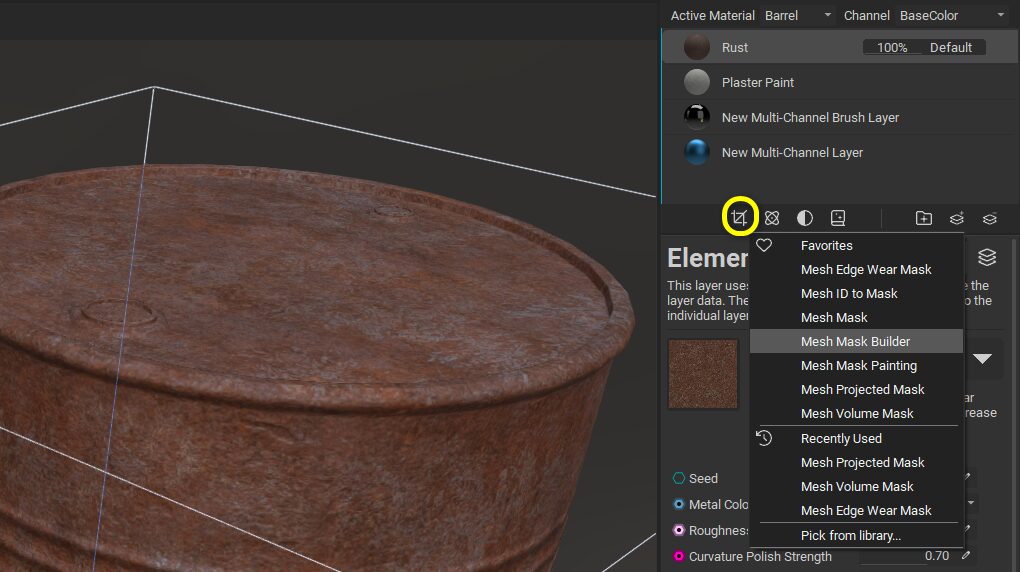
Mesh Mask Builder allows you to create procedural masks using baked texture maps and procedural noise.
It is like a “Mask Editor” or “Mask Builder” for substance painters.
I got the impression that what they can do is similar.
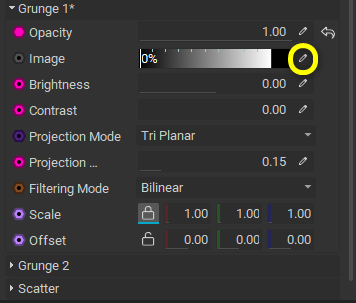
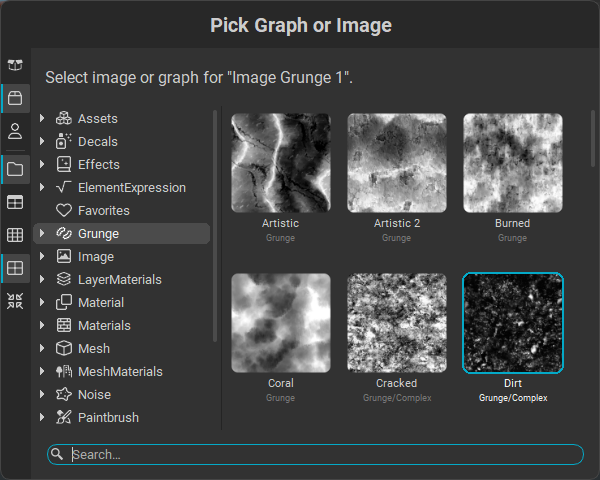
With Grunge, you can paste arbitrary procedural noise, etc.
Check with Image Viewer
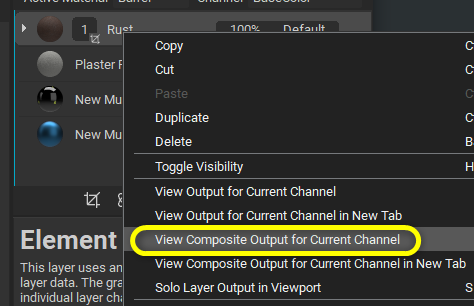
Right-click on a layer and select View Composite Output for Current Channel,
The composite results up to the current layer will be displayed in the Image Viewer, which can display 2D images.
It does not seem to be possible to paint with this Image Viewer.
Also, I tried to find if it is possible to display UVs of the model, but I could not find the function.
It is also inconvenient that I can’t see the texture display unless I run it from the right-click menu…
Is there any way to do this?
Output Texture
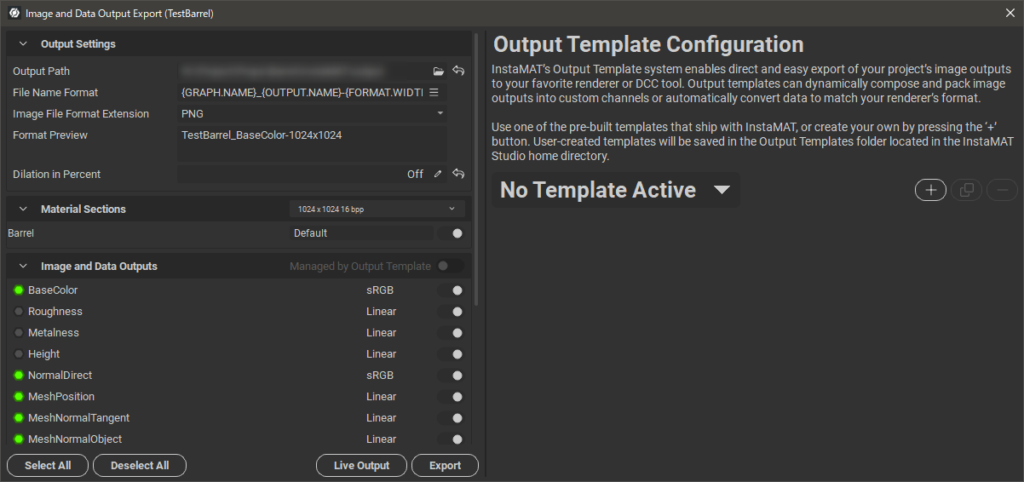
Export from the icon at the top of the screen.
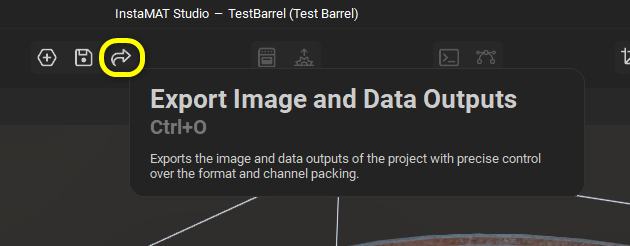
Specify the output path, format, etc., turn on the channel you want to output at the bottom of the screen, and click the “Export” button to output.
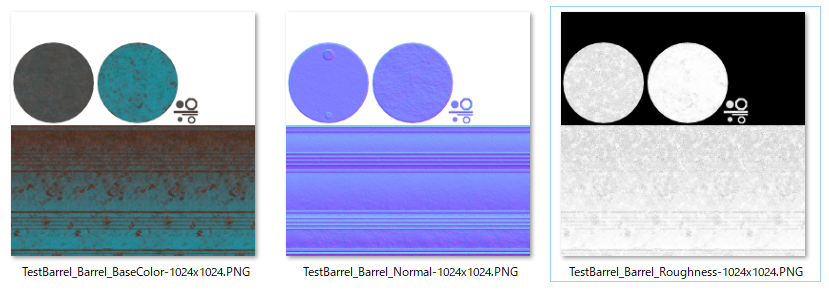
I was able to use it without any major stumbling blocks!
The basics are in place, and I have the impression that users who have used Substance Painter before will find it easy to make the transition.
I have the impression that it will be an easy transition for users who have used Substance Painter before. I look forward to future updates.
If you are interested, please check it out.
G-JOBエージェントは 業界最多の求人数と経験・知識が豊富なコンサルタントによる 転職エージェントです。